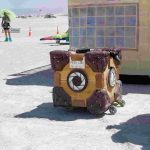
For Burning Man 2015, I took to building a “Mutant Vehicle” or what is commonly referred to as Art Car.
This is based on the Weighted Companion Cube from a game called Portal.
What is portal? This is probably the best intro. The cube is on the left.
The Enrichment Center reminds you that the Weighted Companion Cube will never threaten to stab you and, in fact, cannot speak.
What the Cube is
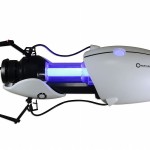
The Weighted Companion Cube is a small, 3 foot by 3 foot powered cube. Underneath is a small but powerful wheel chair base and a lot of robotics. It is controlled, remotely, but the Aperture Science Handheld Portal Gun (a two foot long fake ‘gun’ (it does not shoot)) that will move the cube around when pointed directly at it. I will also have a remote that allows me to override control of the cube.
Well, that part isn’t done yet, but it is driveable.
It is brightly lit by LED strips, Arduino controlled, and will have an onboard sound system that will play noises from the game, as well as droll commentary from GLaDOS.
Concept
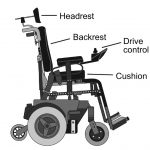
The idea is to take a wheel chair, and remove the chair, leaving the controls.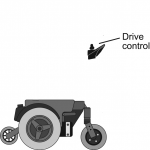
Once the chair is gutted, build a replica of the weighted companion cube, and place it over the wheelchair.
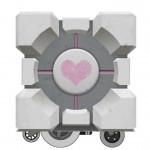 This is what we will end up with – much easier said than done. It is now complete.
The chair itself will be controlled by a Bluetooth link between a pair of Arduinos and Raspberry Pi’s (one in the cube, one in the replica Portal Gun). This will make the entire vehicle extremely interactive. You will move it by ‘pointing’ and ‘lifting’ the cube with the gun.
The Genesis
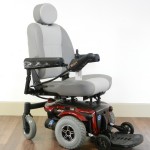
While thinking about the different possibilities for making this thing work, I managed to snag a wheelchair base, specifically, a Jazzy Jet 3. This is a pretty powerful full featured controller (apparently, used wheelchairs have this part frequently go bad). As a benefit, it came with a control system and the joystick base (although no chair arms). It was a bit worn, and needed new batteries, but was otherwise fully functional..
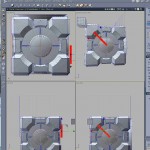
Next, I needed to do some CAD work with the cube to see how to construct it. I ripped the game files and imported them into Carrara, and proceed to make measurements.
This was not as easy as it sounds, as for some reason Carrara doesn’t have good measure tools. I was able to get the job done.
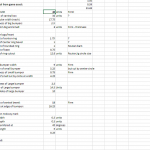
To the right you can see some preliminary drawings. I entered the various dimensions I got from the game as raw numbers into a spreadsheet; I then based a series of formulas that would then calculate what dimensions each piece of the cube would be. I used the spreadsheet to be able to quickly re-figure the sizes based on the width of the wheelchair base, and/or the thickness of the side bumpers, LED lighting slots, etc. I settled on a size of approx 33 inches.
I then further used spreadsheet formulas to work out all of the edges and sizes of the parts of the cube to build cut lists for plywood. I was designing it so that the four ‘lines’ on the original cube would be channels into which LED strips would sit. The circular disks on the sides would hold speakers behind white cloth for 2 of the sides, and LED lights and/or EL wire for all four sides, with the top side being soft foam to sit on.
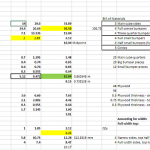
This entailed more spreadsheet work.
The sizes from this spreadsheet would allow me to calculate the sizes of wood that I would need to cut. I arranged the formulas so that I could choose the thickness of plywood (I settled on 1/2″ for weight reasons), as well as the thickness of the LED strips, router bits to handle the angles of the side ‘greebles’ and other parts.The corners of the cube are very thick (slightly more than 2″), and for that, to make a ‘box’ you don’t need that thickness on all 3 corners. There is a similar calculation for the box sides, although not as dramatic.
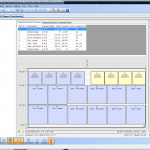
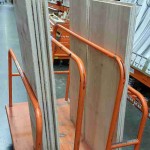
Once this was all done, I used a software package to lay out the plywood cut lists. This worked pretty well and I was able to squeeze every last bit of space out of the plywood. Now all I had to do was get to the Big Box store and get the plywood and drag it home in my SUV.
Once I got the cut list, I went and got the plywood .
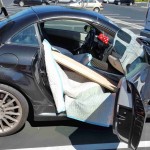
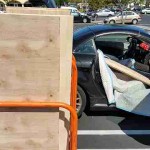
Here is a picture of my SUV.
Yes, it all fit … but it was close. 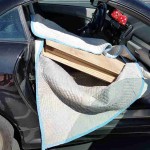 The advantage of the spreadsheet was that I could make sure the quadrant squares were the right width to fit inside the passenger area.
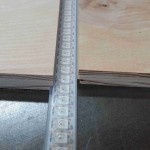
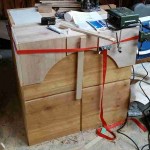
Next, I started fine cutting the plywood. In this view, you can see where I’m allowing precise room for the LED strips. The waterproof strips are hard to glue down, so I made precise cuts in the plywood so that they would be held into the long channels.
The right hand side is pulled apart slightly to show how precise the notch was cut.
This sucker will be BRIGHT.
More to come … the cube is coming together:
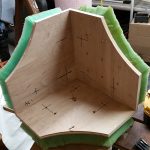
I made the corners to go under foam rubber and be a template for the right curve.
